The campaign level contains many different settings.
Such as targeting settings, budget, and creatives.
The difference from the product level is that the product settings apply to all campaigns, and the campaign settings apply only to a specific campaign and do not affect other campaigns.
____________________________________________________________________________________
Basic Info
Basic info
This section contains general information on the campaign.
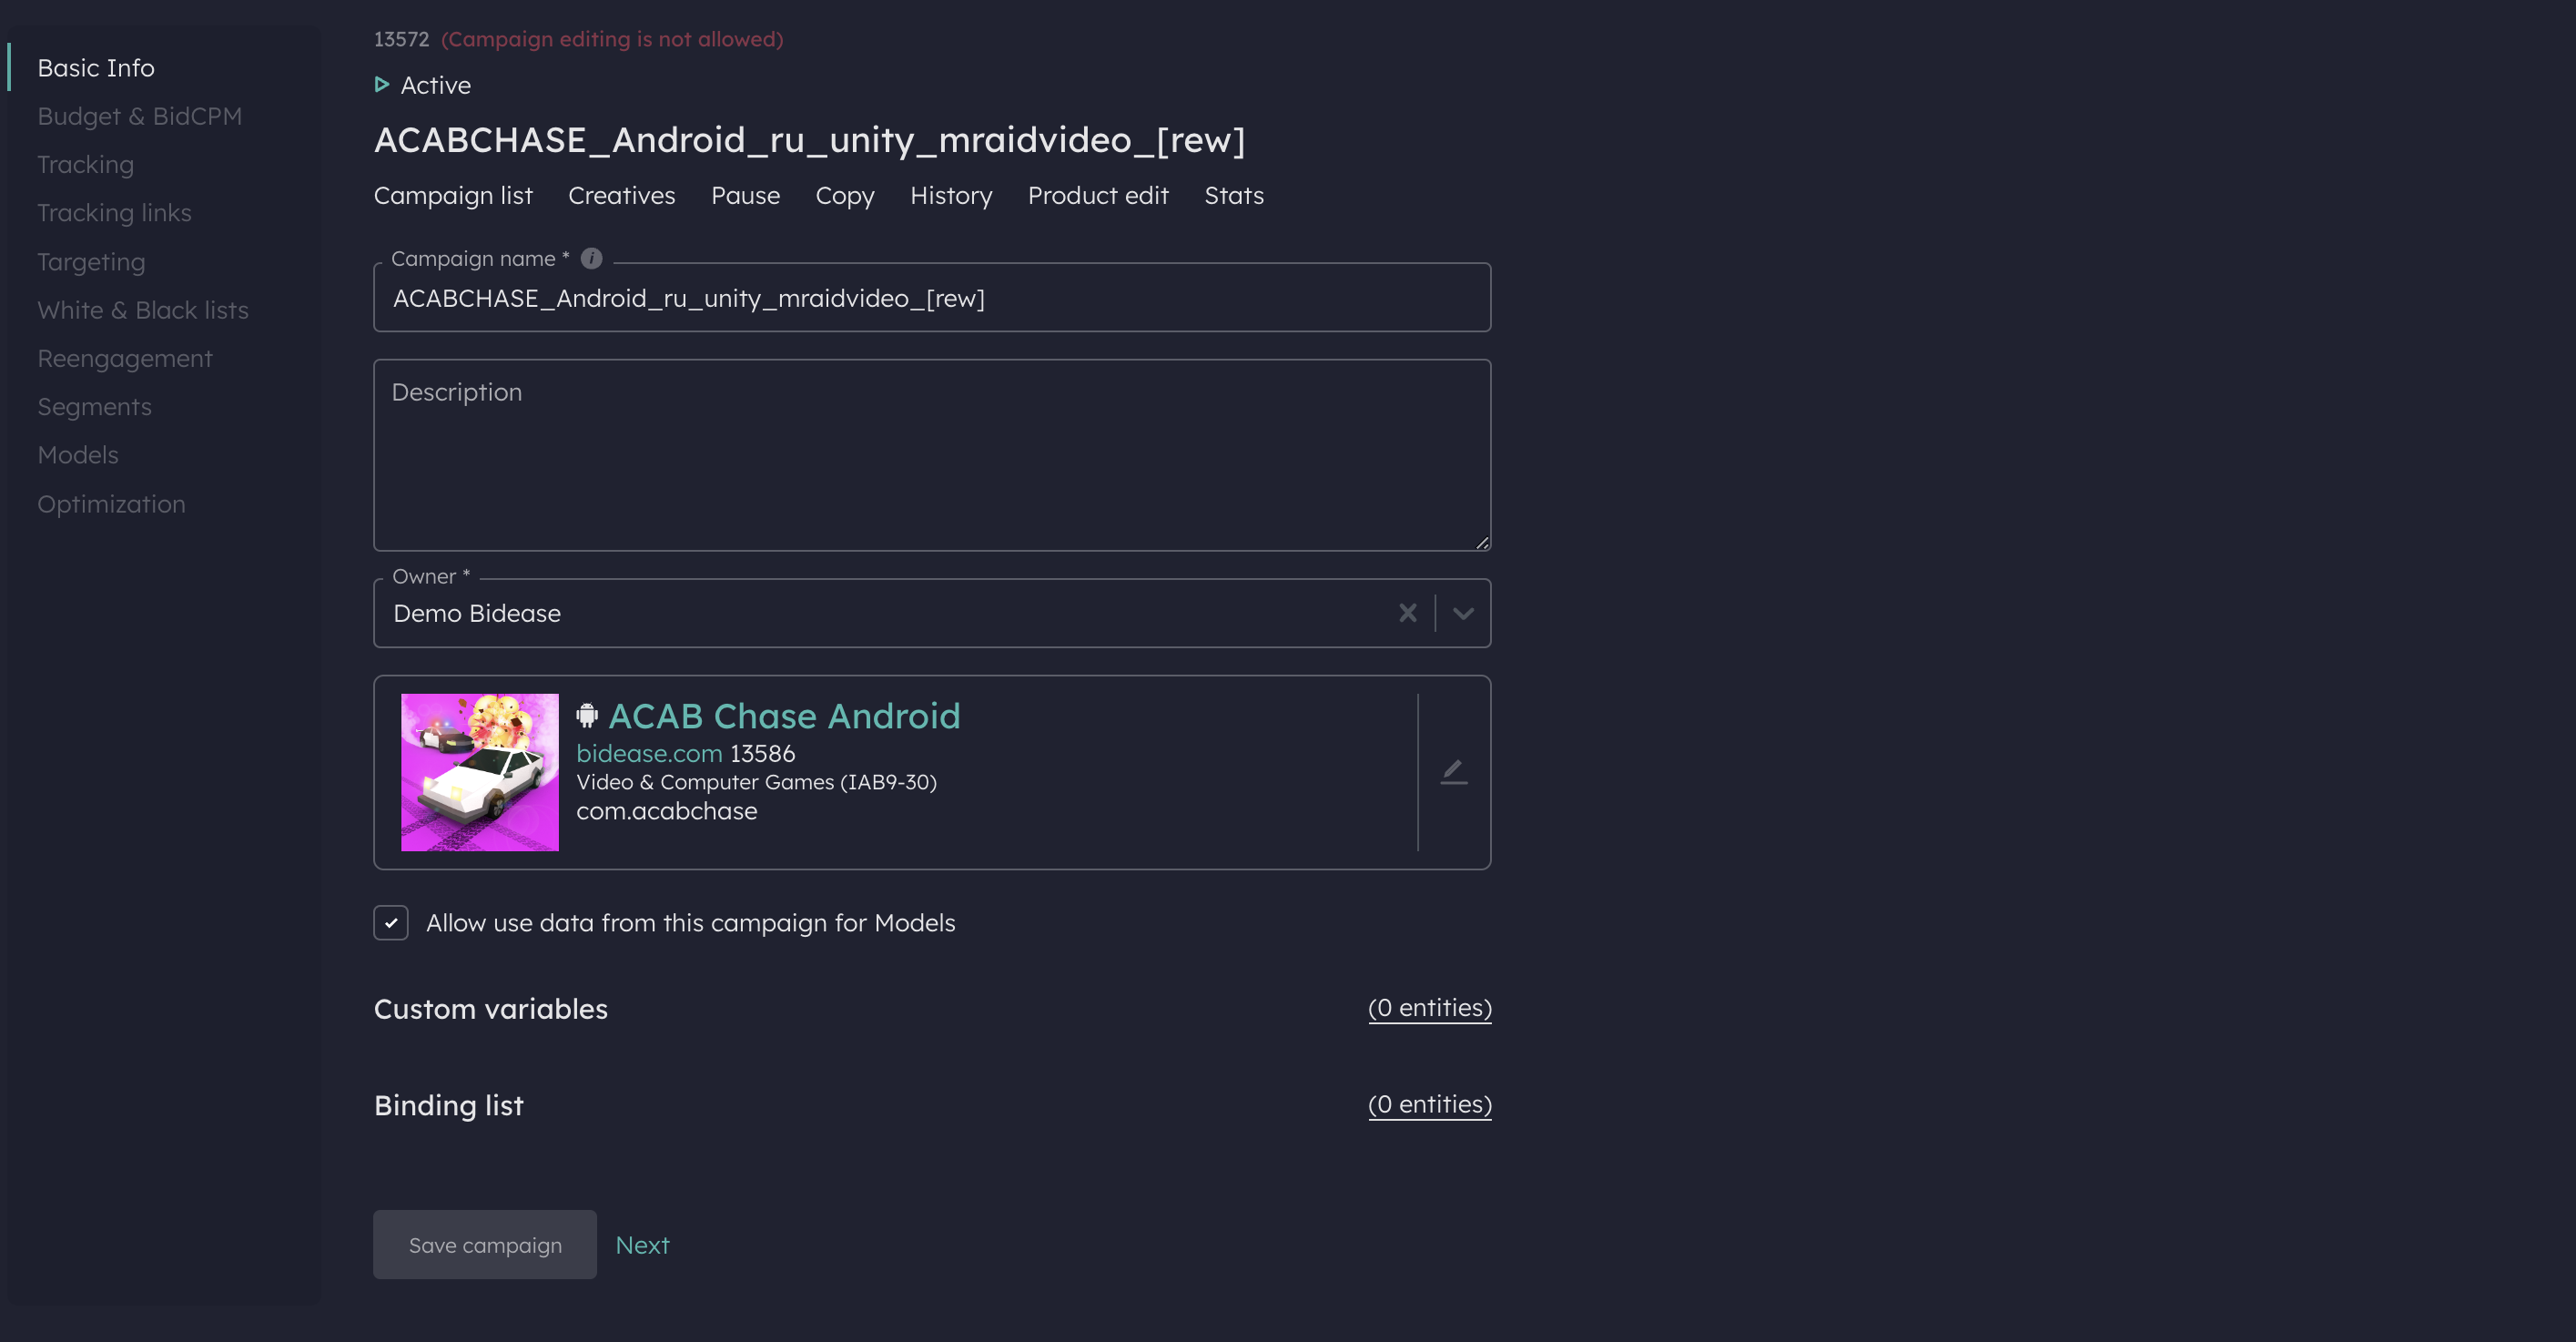
Campaign name
It is a good practice to include as many details as possible in a comprehensive manner as it will help when you use the search tool, see the example below:
ACABCHASE_Android_us_unity_mraidvideo_[rew] :
ACABCHASE - product name
Android - OS
us - GEO
unity - SSO
mraidvideo - Creative type
[rew] - rewarded/non-rewarded
While using this rule, you won’t have to check each and every campaign to know the exact targeting.
You may also use the Description field for extra notes.
Campaign Owner - Set the person who can change campaign settings.
Advertising application/ website - Set the product to advertise (usually pre-installed by our team)
____________________________________________________________________________________
Budget & BidCPM

Budget & BidCPM settings
This section will help you with setting up budgets and limits:
Budget - a campaign budget for the whole period;
Pace limit per hour - hourly spend limit;
Daily revenue limit - set the limit of revenue to automatically start and stop a campaign;
BidCPM - price per 1,000 impressions.

List of BidCPM
You can set custom BidCPM for different applications or ad placements.

List of BidCPM settings
Write down Bundle ID of application, Ad placement ID and custom BidCPM.
Click add and save the setting using the “Apply” button.
Please do not forget to Save the changes! Click Save Campaign.
__________________________________________________________________________________
Tracking

Tracking
Check the box “Enable agency fee” to count the amount of Revenue. Leave the “Agency fee” field empty.
It is important if you want to use the Revenue limit option.
__________________________________________________________________________________
Targeting
 Targeting
This section will help you to set different targeting settings and other features to manage you campaign.

Targeting settings
Has IFA
mark it to only target IFA(IDFA) traffic
leave blank to only target non IFA traffic
mark with a dot to target both
Traffic with a user ID is usually more expensive, but it opens up more opportunities for retargeting and reengagement.
Rewarded
mark it to only target rewarded inventory
leave blank to target non-rewarded inventory only
mark with a dot to target both
The ads are shown to the user for a reward (extra life in the game or bonus points).
The user's involvement in such an ad is higher, but the cost also increases compared to non-rewarded traffic.
13+(Coppa) age restriction
mark to only bid on traffic that targets children under 13
leave blank to target traffic that targets children above 13 and adults
mark with a dot to target both
This feature is used to restrict the display of ads that contain sensitive products and may be undesirable for showing to a young audience, in particular in the United States.
SKAdNetwork
mark to only bid on SKadNetwork bid requests
leave blank to only bid on non SKadNetwork bid requests
mark with a dot to target both
Get traffic from the Apple Framework.
Retargeting (for retargeting campaigns only, please consult our specialists)
Retargeting campaigns help to reengage the users who have already seen the ad or installed the application to complete any additional in-app activity. The system will focus on the users who already have the advertised application installed.
To target those users, you may need to manually upload the list of ids (segment) and select it in the campaign settings on the segments tab.
 Start/Stop date settings
With “Start date” and “Stop date” you can set a period when the campaign is active.
The campaign cannot be launched before or after the specified dates.
 Device type and os versions
Limit the device type to exclude devices that do not fit your offer or show poor conversion rates.

Working days and hours
Use the "Work Schedule" tool to set the days and hours when campaigns are active.
The time in the chart is set to the selected time zone (in account settings).
The chart may vary depending on the selected time zone.
For example, if you set the campaign start at 1 a.m. UTC, and change the timezone settings to UTC+3 ( Moscow time), the chart will display the start of the campaign at 4 a.m ( Moscow time).
__________________________________________________________________________________
White & Black lists

White & Black lists
White and blacklists section allow you to set up different targeting criteria. The mechanism of using it is almost the same for all lists:
Click on the name of a parameter;
Choose the type of a list: White or Black;
Select the desired values from the drop-down list or enter them manually;
Click the add button (if required);
Click the Apply button.
Let’s review the most interesting parameters:
Applications

Applications blacklist
Specify the bundle id of the applications that you want your ads to be displayed (Whitelist) or that you want to exclude from targeting (Blacklist).
Please note that if the campaign is running on a Whitelist, then the Blacklist cannot be used; and when the auto blacklisting function is enabled, applications will be removed from the white list without being blacklisted.

Cities
To add a city, start typing the name in the search field and click the Add button next to the desired option.

Super GEO
To select a specific area on the map for targeting - click on the name of the city and specify the area on the map in the red.
Most of the other available fields are filled in similarly.
__________________________________________________________________________________
Reengagement

Reengagement
The Reengagement function is used if it is necessary to show ads to users who have previously participated in the advertising of this product.
Click the plus button and use the search to select a previously launched campaign. The system will take information about users from the previous campaign and will target them. In this case, it is not necessary to load the user segment, since information about the users is already available.
__________________________________________________________________________________
Segments

Segments
If you have uploaded a user segment or a segment for exclusion, you can select it in the campaign settings.
To do that, choose the list from the drop-down menu and select the type: Whitelist or Blacklist.
Whitelist - the system will target users from the list;
Blacklist - the system will avoid users from the list.
__________________________________________________________________________________
Models Use the drop-down filter to search for models by a specific bundle or enter the name of the model in the search box. And set target goal price.
__________________________________________________________________________________
Optimization
Auto Blacklisting

Auto
The system provides an option to automatically disable inefficient applications based on CPI and spend. When the limit is reached, the system will automatically exclude the application from targeting.
The auto blacklist formula compares total app spend VS (Auto BL App free spend) + Conversions * Avg CPI multiplier threshold - Given the average CPI for the campaign App would be blacklisted if app CPI is higher than avgCPI * multiplier value and removed from blacklist otherwise
If an app is blacklisted but some conversions happen letter it will be automatically taken out of the blacklist as long as it fits your spend criteria.
Pace Keeper Use PaceKeeper to improve spending pacing through day
A/B testing
If checkbox enabled bidding would be active only in a part of all impressions defined in Testing range.
on campaign, for a/b to compare campaigns on product, for a/b to compare products
 on creative, for a/b to compare creatives
Set the:
Testing label - Label would be added to impressions for further analysis
Testing range - Impressions is splitted into 100 equal parts and only selected (inclusive range) part would be targeted.
A/B settings examples
Product [0-49] "A" & key=20 -> "A", OK
Product [0-49] "A" & key=50 -> REJECT
Product [0-49] "A" & Creative [40-80] "B" & key=20 -> REJECT
Product [0-49] "A" & Creative [40-80] "B" & key=70 -> REJECT
Product [0-49] "A" & Creative [40-80] "B" & key=45 -> "B", OK
Product [0-49] "A" & Creative [50-99] "B" & key=* -> REJECT
__________________________________________________________________________________
Menu


Additional menu
You can use additional menu on top of the campaign page:
Campaign list - Press to go back to the campaign list;
Creatives - Press to go to creatives settings of current campaign;
Start/Pause - Press to Start or Pause a campaign;
Copy - Press to copy current campaign;
History - Press to track campaign history of changes;
Stats - Press to go back to stats page.

History
The history tab will show all the changes that have occurred in the campaign settings.
Was this article helpful?
That’s Great!
Thank you for your feedback
Sorry! We couldn't be helpful
Thank you for your feedback
Feedback sent
We appreciate your effort and will try to fix the article